Commander Solved: Lands
In this article I will be attempting to solve some common questions about lands, mathematically.
- How many lands should I run?
- How do ramp spells affect my number of lands?
How many lands should I run?
The more lands you run, the more likely is that you will draw the number of lands that you need in the early game. However, run too many and you risk drawing too many lands and not enough other cards to play with those lands. I’ll be using some common terms to describe these situations. Too few lands is often referred to as “Mana Screw”, while too many is referred to as “Mana Flood”.
Hypergeometric distribution in probability
We can solve for the probability of either of these things happening by using something called hypergeometric distribution. This type of probability model is uniquely suited to card games as it calculates the chance of a set of events happening without replacement. Meaning that each time a card is drawn the probability that you will draw your desired card changes, because the total deck size and number of successes or failures in the deck changes. Hypergeometric distribution accounts for these cumulative changes and gives a total probability of a desired outcome after multiple draws.
Solving this on paper frankly takes more math skills than I will ever have. Thankfully, there is a community for everything and tools are available to do the calculation for me. The function of Hypergeometric Distribution that I will be using most is called the “Cumulative Distribution Function” and it answers the following question in regards to lands in a deck:
Given a total deck size of A with B total lands, what is the probability of drawing X or less lands in Y number of draws?
Our answer is given in a decimal percentage. From there we can also see our probability of drawing more than X lands. Whatever our chance of drawing “or less” is, if we subtract that from 100% we will have the chance of drawing “more”, as either one scenario or the other must occur (e.g. If we have a 40% chance to draw “3 or less”, we will have a 60% chance to draw “more than 3”. The sum of all possible scenarios must equal 100%).
Lets calculate!
For this example, let’s just focus on how we calculate Screw. We need several pieces of info to get started.
| Deck Size | A |
| Total Lands | B |
| Desired Lands Drawn | X |
| Total Cards Drawn | Y |
To define these things we have to think about what would constitute a Screw, and look at the needs of our deck. For the purpose of this article I’ll be considering a Screw to be missing more than 1 land drop and a Flood to be drawing more than 1 excess land. As for how many lands we need to draw, well that depends on the deck. Some decks can run on very few lands. We can decide what number to use by looking at the average converted mana cost of our deck, or perhaps the cost of our commander or the cost of other key cards that you know that your deck needs to play. For now let’s assume we know our deck really needs to get to 3 mana.
A Screw for this deck would be drawing 3 or less lands by turn 5. Meaning 2 or more land drops were missed. Or...
| Deck Size | 99 |
| Total Lands | to be determined... |
| Desired Lands Drawn | 3 |
| Total Cards Drawn | 12 (opening hand of 7 cards + 5 turns) |
Note: Yes, I know mulligans are a thing. One free mulligan is not going to offset our probability by much. Since a mulligan is our choice and not just random it’s only going to serve to slightly reduce the chance of both a Flood and a Screw equally, assuming our choice is well informed. So, while it will improve performance overall, it’s not going to skew results in one direction or another. If you want to actually calculate the effect of multiple "London mulligans" on the probability of drawing specific cards, good luck and let me know how it turns out.
The last remaining piece is the “Total lands”. If we want find out how many lands is the perfect number for a deck which needs 3 lands to run, then we will want to see our chances of NOT getting a Flood or Screw for each number of lands that you can possibly run, first 0, then 1, then 2, all the way through 99. So, let’s repeat this whole calculation 100 times for Screw and do a slightly different calculation 100 times for Flood and let’s also record the chance of neither event happening, and call that Sweet Spot. We are looking for the number of lands which has the highest Sweet Spot percentage.
Doing that much math, even with a hypergeometric calculator, would take several years off my life. Thankfully, JavaScript is pretty good at looping through multiple scenarios. Here is a chart with those percentages for every number of lands you can run.
We did it! 37 lands is the perfect amount of lands and will mathematically give you the best chance of reaching 3 mana without a Flood or Screw.
Let’s see more results if your deck is trying to hit a different number of land drops.
Now you know EXACTLY how many lands is right for your deck. Further more, these graphs show why CEDH or competitive decks can run 30 or less lands. Because, those decks have an incredibly low curve and can run just fine on 1-2 lands. Decks that need 3 mana to run do well with around 37 lands. Decks that need 4 or more land drops before they can start working well probably require a lot more lands to run successfully than you think, and likely more than you are running in your decks.
Wait, what about ramp? Aren’t ramp spells kind of lands?
Ramp spells are kind of like terrible lands and mess with our math in a way that I’m afraid to think about for too long. However, I think we can identify the point when you should run less ramp and more land. I have played some ramp spells before and I know that sometimes they feel great and other times they are trash. When you have no lands in your hand and you are hoping to draw one more land for your big spell, then you instead draw a ramp spell like Nature’s Lore. That spell in that scenario is effectively like drawing a land that you have to pay additional mana in order to play. If that was a card it’d look something like this…
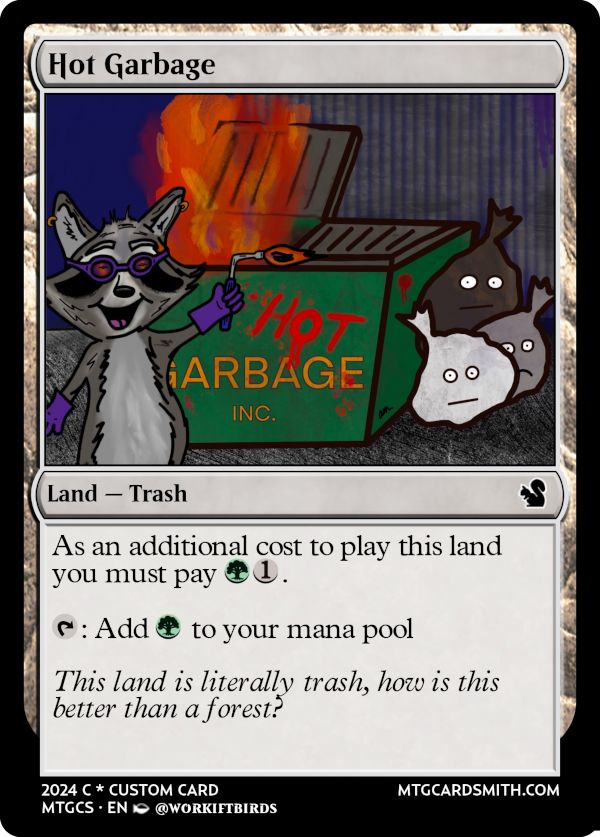
Artist credit: @workiftbirds
The only advantage Hot Garbage (ramp cards) have over a land is that they are not limited by the one land drop per turn rule. Therefore, ramp is only good if you can make your regular land drop on the same turn, otherwise, it’s actually just Hot Garbage. In fact, you really need to make your land drop on the following turn as well. Otherwise you’ll end up with the exact same amount of mana as if you had just played lands, only you had to spend more resources to get there. Furthermore, being accelerated past the normal curve for only a single turn after playing a ramp spell isn’t really enough of an advantage to warrant spending mana on. I’d like to know that if I cast a 2 mana ramp spell after making my land drop on turn 2 I have a good chance of making my next 2 land drops after that, giving me access to 5 mana on turn 4. If I’m just going to end up with 4 mana on turn 4 anyway, I’d prefer the consistency benefits and higher overall available unspent mana of just playing 4 lands. Consider the following…
Access to unspent mana by turn 4. (Scenarios that leave you with 4 mana on turn 4.)
| Cards Drawn | Unspent mana by turn | Total unspent mana | Better than a 4th land? |
|---|---|---|---|
| 3 lands + turn 1 ramp | 0,3,4,4 | 11 | 👍 |
| 4 lands | 1,2,3,4 | 10 | 😐 |
| 3 lands + turn 2 ramp | 1,0,4,4 | 9 | 🤷 |
| 3 lands + turn 3 ramp | 1,2,0,4 | 7 | 👎 |
Therefore you could say 2 CMC ramp is worse than having your 4th land. While you could argue the benefit of having 4 mana on turn 3, in order for 2 CMC ramp to be definitively better than a land we really need that ramp in addition to 4 lands. So, it follows that your chance to make your first 4 land drops is also the chance that a 2 CMC ramp spell is better than a land during those turns. After turn 4 the probability that your ramp spell is actually Hot Garbage will only go up from there; because the chance that you are going to hit subsequent land drops will only go down. Similarly, you need to make your first 5 land drops for 3 CMC ramp to be better than a land. This is why there is such a big difference in the viability of 1, 2 and 3 CMC ramp spells. So, since we can calculate the chance of making land drops using the method above we can also calculate…
Chance your ramp spell is Hot Garbage
| Lands in your deck | 1 CMC ramp | 2 CMC ramp | 3 CMC ramp |
|---|---|---|---|
| 20 | 67.5% | 84.6% | 93.8% |
| 21 | 64.3% | 82.3% | 92.4% |
| 22 | 61.0% | 79.7% | 90.8% |
| 23 | 57.8% | 77.0% | 89.1% |
| 24 | 54.6% | 74.3% | 87.2% |
| 25 | 51.4% | 71.4% | 85.1% |
| 26 | 48.2% | 68.4% | 82.9% |
| 27 | 45.2% | 65.4% | 80.5% |
| 28 | 42.2% | 62.3% | 78.0% |
| 29 | 39.3% | 59.2% | 75.3% |
| 30 | 36.4% | 56.0% | 72.6% |
| 31 | 33.7% | 52.9% | 69.7% |
| 32 | 31.1% | 49.8% | 66.7% |
| 33 | 28.7% | 46.7% | 63.7% |
| 34 | 26.3% | 43.7% | 60.6% |
| 35 | 24.1% | 40.8% | 57.5% |
| 36 | 22.0% | 37.9% | 54.4% |
| 37 | 20.0% | 35.1% | 51.2% |
| 38 | 18.1% | 32.4% | 48.1% |
| 39 | 16.4% | 29.8% | 45.0% |
| 40 | 14.7% | 27.4% | 42.0% |
| 41 | 13.2% | 25.0% | 39.0% |
| 42 | 11.8% | 22.8% | 36.1% |
| 43 | 10.6% | 20.7% | 33.3% |
| 44 | 9.4% | 18.7% | 30.6% |
| 45 | 8.3% | 16.8% | 28.0% |
| 46 | 7.3% | 15.1% | 25.5% |
| 47 | 6.4% | 13.5% | 23.2% |
| 48 | 5.6% | 12.0% | 20.9% |
| 49 | 4.9% | 10.6% | 18.8% |
| 50 | 4.3% | 9.4% | 16.8% |
| 51 | 3.7% | 8.2% | 15.0% |
| 52 | 3.2% | 7.2% | 13.3% |
| 53 | 2.7% | 6.2% | 11.7% |
| 54 | 2.3% | 5.4% | 10.3% |
| 55 | 2.0% | 4.6% | 9.0% |
| 56 | 1.6% | 4.0% | 7.8% |
| 57 | 1.4% | 3.4% | 6.7% |
| 58 | 1.2% | 2.9% | 5.8% |
| 59 | 1.0% | 2.4% | 4.9% |
| 60 | 0.8% | 2.0% | 4.2% |
So at this point, you need to ask yourself: “How much risk of drawing Hot Garbage am I willing to accept for the possibility of accelerating my deck”? If the risk is too high, you should cut one or more of your worst ramp spells in your deck and run additional lands instead. This will improve all your other ramp spells probability of not being Hot Garbage, and help your deck be more consistent overall.
Personally, I don’t want to run any ramp spell that is Hot Garbage more than 40% of the time. Which means if I’m running less than 36 lands, I should not run any 2 CMC ramp, because at 35 lands 2 CMC ramp is worse than a land 40.8% of the time.
Note: There are some ramp spells that ramp you by more than 1 mana or give you an additional land to play. Ramping an additional time would effectively offset the required number of land drops by 1. So for the purpose of the chart above we can treat Cultivate as if it were a 2 CMC spell. Thran Dynamo would also be treated like a 2 CMC. While it’s not a perfect equivalent, it’s a good baseline for the risk level of the cards.
When it comes to ramp, run however much you want, but not at the cost of lands. If you are running a low amount of lands and you are depending on your ramp to fix your chances of a Screw, you are really just filling out your lands with copies of Hot Garbage. Remember that removing even one land to add ramp makes all your ramp cards worse. Ramp responsibly.